Simple AR Layering with Halo AR App (#30DaysXR, #Day3)
Today, I finally completed a halo using the Halo AR app. It took me a while to figure out how to use it from start to finish (sharing the finished product). There was little or no documentation, but there was a Discord channel for Halo creators, so that helped me a bit. There was one YouTube video on how to create a halo, but it was still rather unclear. If you need some info, contact me. Essentially, here are some instructions that have been left out:
- You must create the halo in a new collection. Select “+ Create Collection” to do so, and make sure you select Public under the options.
- To preview and view your halo, you have to scan the trigger using the app on an external screen (i.e., outside your phone). Trying to access it within the phone didn’t work. I had to scan the image on my laptop. Also, scanning the QR code didn’t work either for me.
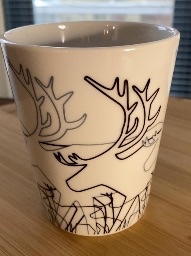
Here’s my final product. Scan the trigger image below using the Halo AR app and you will see the layer on top of it.

If you don’t plan to scan it, here’s a short clip that shows what happens when I scan the trigger or target image using the app on my iPhone:
Why a cup and a poster? The back story is this: my dear Twitter friend, Tanya, met me in Vegas when we presented our AECT 2019 poster. She gave me this conical cup made in Sweden—hence the association. The important part of using this app is to carefully consider what information you want to layer on to the target image: something meaningful of course.
Try this app out yourself!

